In order to correctly position the PTZ camera in ActivePTZ mode and in order for a PTZ camera to operate properly as part of the ActiveDome plugin, the camera's optics must first be calibrated.
If your camera's model is in the "Select vendor" dropdown list, then simply select it from the list. Otherwise:
- Select "Any camera (Analyze Optics Model)" in the "Select vendor" dropdown list.
-
Arrange the camera such that the image contains as many contrasting areas as possible.
Tip
Preferably, there should not be motion and external noise (rain, snow, swaying trees) in the camera's field of view during the optics analysis.
-
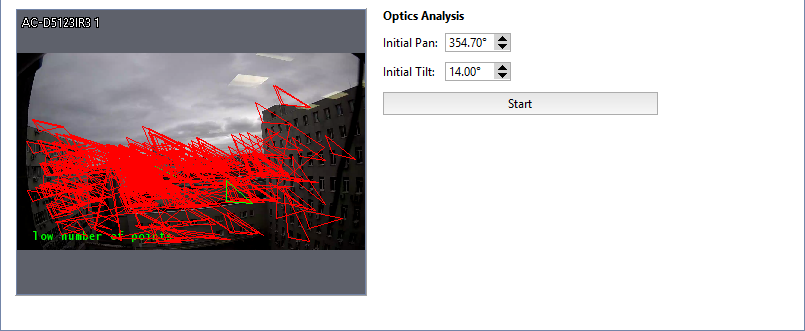
Click "Start".
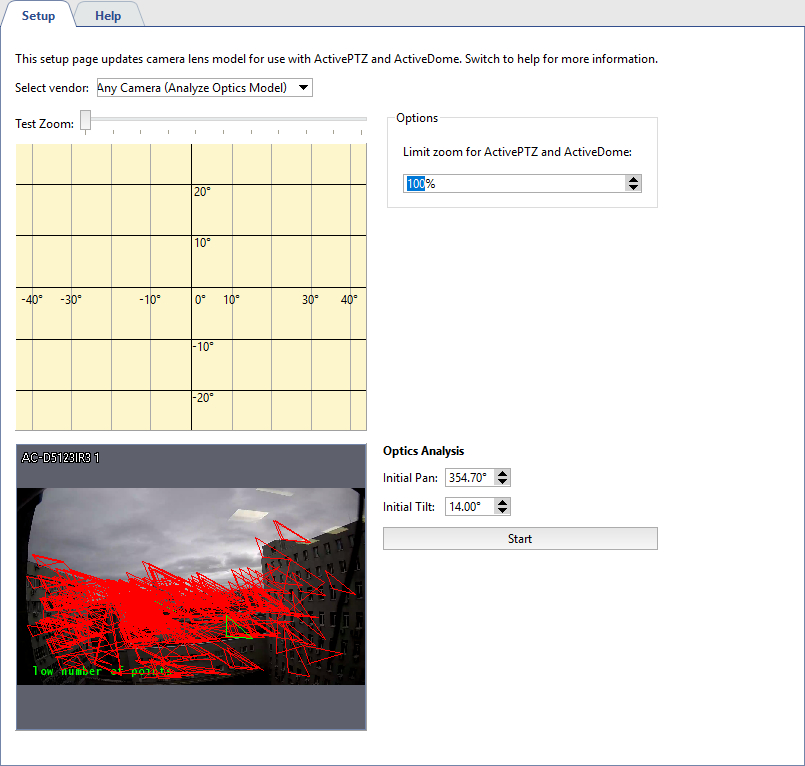
The automatic optics calibration process will start (it may take several minutes). During the calibration, the camera will aim at different points of the scene. When the calibration is complete, the coordinate grid is displayed on top of the image and a button to send the model optics appears.
Tip
The Limit zoom for ActivePTZ and ActiveDome additional parameter lets you manage the camera maximal zoom. The default value is 100% (no limits). In case the 0% value is set, the camera will rotate in the required direction without zoom.

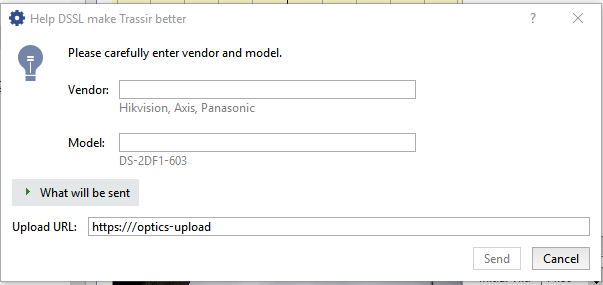
If you want to help the development of our software, you can send the resulting calibration to us. To do this, click the "Send optics model" button. A dialog box in which you can specify the manufacturer of the camera, its model, and see exactly what information will be sent, will open. Leave the "What will be sent" field default. Click the "Send" button to transfer the information.
Tip
To test the calibration results, try to direct the camera at several points in ActivePTZ mode.
