The Line crossing detector is used to automatically detect cases of crossing a specified virtual boundary in the field of view of a video camera for the purpose of perimeter control, facility protection and security. When a line is crossed by a person, vehicle or other object, the system immediately reacts: sends a notification to the operator, starts video recording or activates other pre-configured actions.
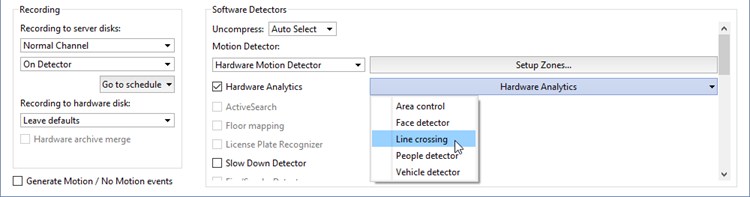
To enable and configure the Line crossing detector, you need to check Hardware Analytics in Channel Settings, click the button and select Line Crossing.
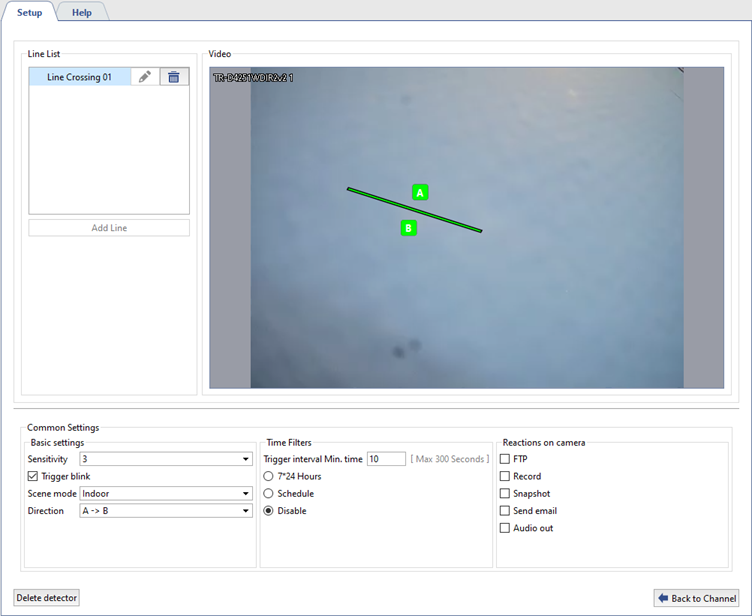
Detector settings window:
-
In the Line List, select a line and place it on the camera video. To do this, click on one end of the line and move it. Do the same with the other end of the line.
-
Define the Common Settings of the detector:
- The Sensitivity parameter determines the sensitivity of the detector. The higher the value, the higher the probability of detecting a line crossing. If false alarms occur, the sensitivity value should be reduced.
- Check Trigger blink to enable visual display of the line crossing event. This will help the operator to notice the violation faster.
- Select the Scene mode: Indoor or Outdoor to optimize the detector's performance depending on the recording conditions.
- The Direction parameter determines in which direction the line must be crossed for the detector to record an event: A→B, A←B or A↔B.
-
In the Time Filters setting, select the detector operating mode:
- The Trigger interval Min. time parameter defines the minimum time (in seconds) during which a person must cross the line for the detector to register the event. The lower the value of the parameter, the higher the sensitivity to short-term line crossing. The higher the value, the lower the probability of false alarms during accidental line crossing.
-
Select the detector working mode:
7*24 h.: if it is necessary for the detector to work continuously around the clock, 7 days a week.
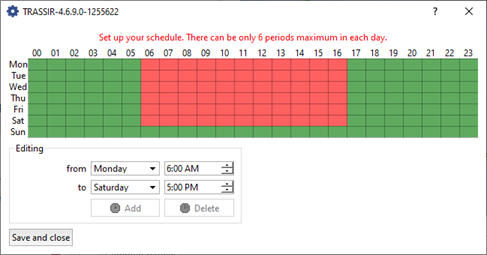
Schedule: to set up specific intervals for the detector to operate. To do this, click on the Edit link and in the window that opens, highlight in red the time intervals during which the detector should be active.
Disable: to turn off the detector.
-
In the Reactions on camera setting, select the actions that will be performed when the detector is triggered:
- FTP: send files (for example, photos or video clips) to the specified FTP server for storage or subsequent processing.
- Snapshot: create a snapshot of an image at the moment of an event and save it to the camera's local storage or to an NFS server.
- Record: automatic start of video recording from the camera when the detector is triggered. The footage is saved to the local storage of the camera or to the NFS server.
- Send email automatically send a notification with an attached photo or other information about the event to an email address.
- Alarm output: activate a connected external device (for example, a siren) via the camera's alarm output.
- Audio out: playback of the camera's audio signal through a connected device.
Tip
The list of available reactions depends on the camera model.
To perform the selected actions, all necessary parameters must be correctly configured in the camera settings. For details, see the camera user manual.
