This section allows you to create and edit work schedules that are used to determine the working time of an employee when building various reports.
Go to Plugins ->Access Control ->Work Schedule to open.
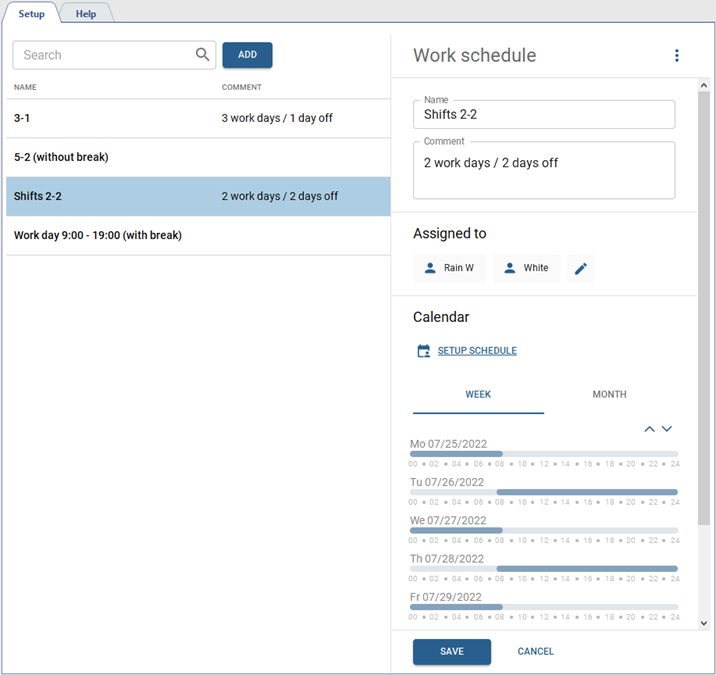
In order to create a new work schedule, press Add and follow the next steps:
- add a new work schedule name that will be displayed in the person's settings;
- add comment, if necessary;
- add groups of persons or individual person to whom this work schedule will be assigned;
- customize the schedule (the detailed instructions on how to customize the schedule are described below).
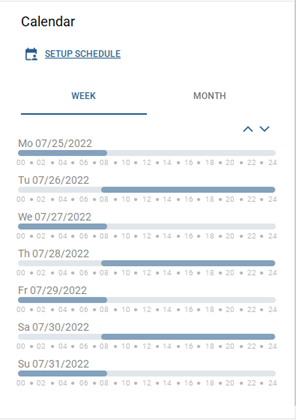
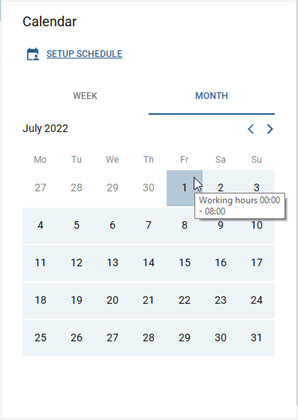
After creating a work schedule, you can check its timing for the week as well as for the month.
Schedule settings
You can use the following schedule types when creating:
- Calendar week is a schedule that lets you create a working schedule with reference to the specific days of the week.
- Shifts is a schedule that specifies a cycle of intervals in which the work schedule depends on the day number in the cycle.
Press Setup schedule to open the schedule settings.
Table 111.
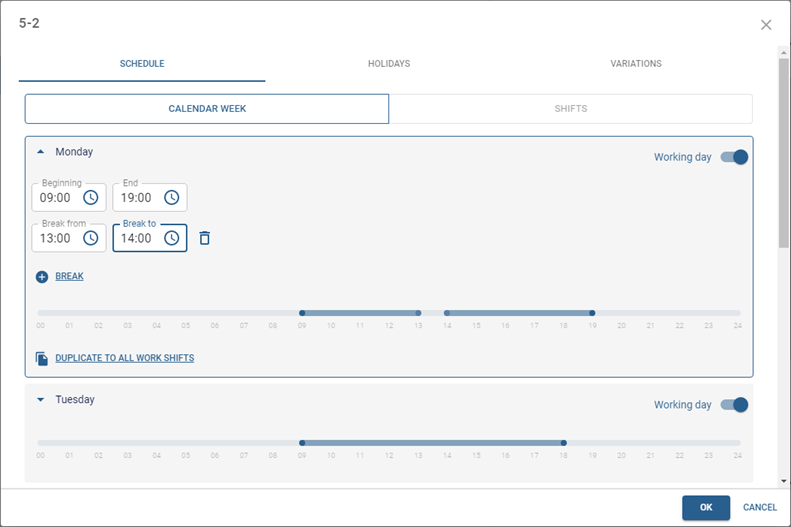 |
Follow the next steps to create the Calendar week schedule type:
|
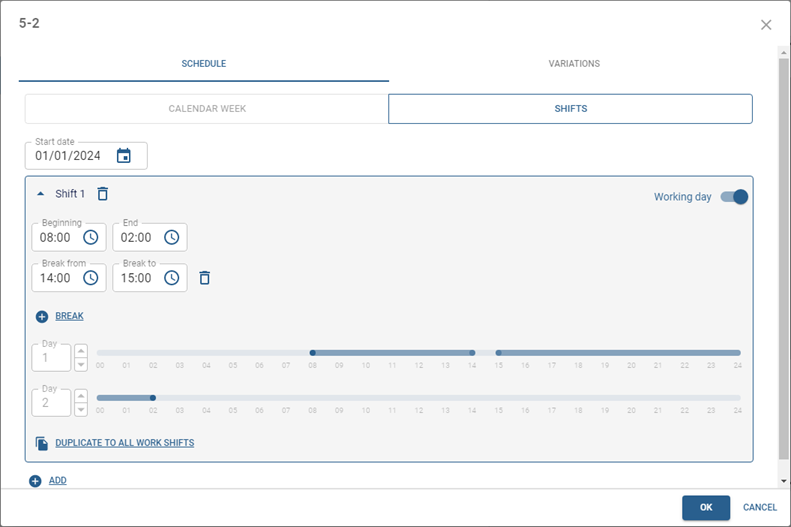 |
Follow the next steps to create the Shifts schedule type:
|
Tip
The breaks define only the interval of time during which a person can be absent from the workplace for the entire working day. The strict time limits for the beginning and end of breaks are not taken into account in Access Control.
Tip
In order to create a shift that begins on one day and ends on another, choose the time in the End field that is less than or equal to the time in the Beginning field.
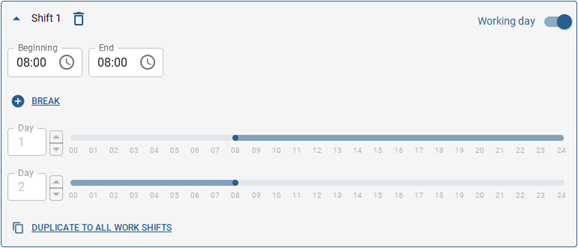
Table 112.
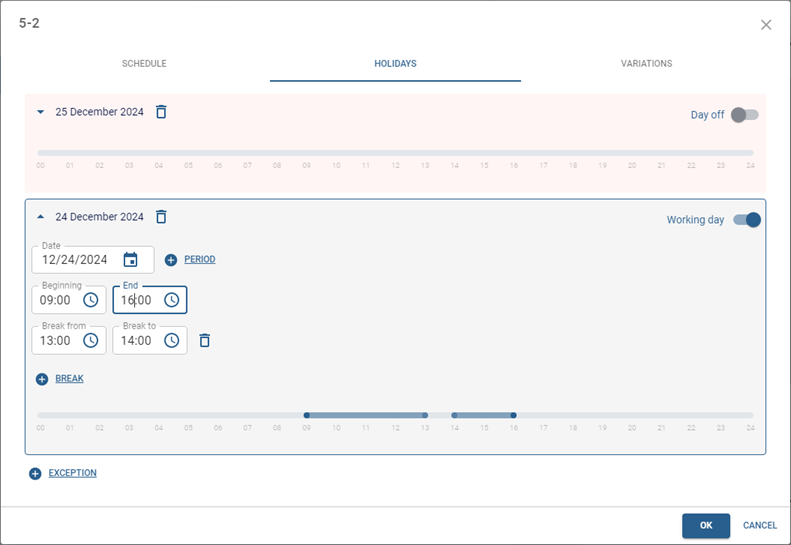 |
The Holidays tabs lets you add the dates, in which another schedule will be in effect (for example, on pre-holiday and holiday days). |
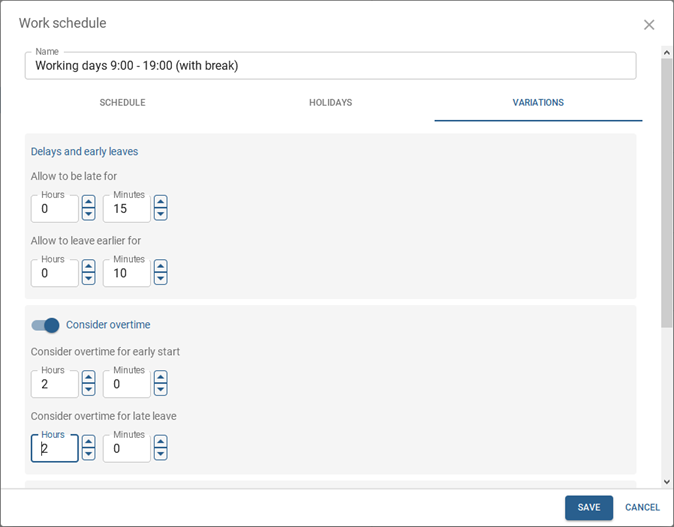 |
The Variations tab provides parameters that can be used for more flexible customization of the employees' working schedules.
|
