Creating a new template

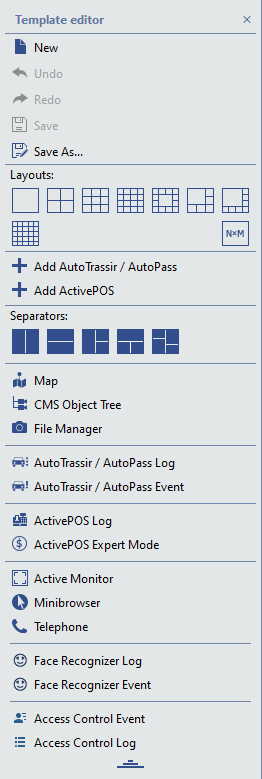
Clicking the button will display the Template editor menu, which can be used to configure the appearance of the video monitor interface.

By default, the template editor menu is displayed in a compact view. Click to display the full menu.

The main upper section contains menu items to manage templates:

Table 25. 

Create a new design template

If any design was configured on the screen and it was not saved, then the settings would be lost. When you create new design, a new window appears, filling all free space in the center of which there will be the inscription: "Drop GUI Elements here". All customization actions are performed by selected items drag-and-drop. The drag-and-drop zone will be highlighted blue.

Undo the last action with the template

Does the same as CTRL + Z in Windows.

Redo the canceled action with the template

Save current template

Save the template under a new name


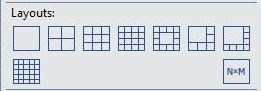
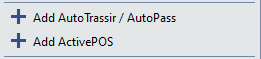
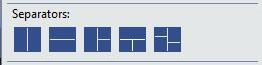
Below you will find structural elements that will help you create a template of any complexity and configuration.

Table 26. 

  • Layouts – A selection of preset arrangements of camera signals (displayed in a separate section). The layout's icon corresponds to how the zone's available space will be allocated. The NxM layout lets you manually specify the number of cameras to be displayed (15 x 15 = 225 maximal). To apply a layout, select and drag it on the desired place on the screen.

  • Add AutoTRASSIR/AutoPass. Shows AutoTRASSIR/AutoPass plugin info. When pressed, two areas will be displayed: AutoTRASSIR/AutoPass log (a list of all recognized license plate numbers) and AutoTRASSIR/AutoPass Event (detailed information about the license plate number). The specified areas are docked to the existing template on the left and below, preserving the original screen structure. Clicking the menu item again hides the information from AutoTRASSIR/AutoPass plugin.

  • Add ActivePOS. Shows ActivePOS plugin info. When pressed, ActivePOS Log area (the list of checks for cash management) will be displayed. The area is docked to the existing template on the right, preserving the original screen structure. Clicking the menu item again hides information from the ActivePOS plugin.

  • Separators are the basic structural units of the template. They allow you to split the work area into any number of sections with absolutely any combination of options.

    In order to split a new template into several areas, just drag and drop the desired type of separator on it. The separator icon shows how the screen space will be divided into zones. The resulting areas can be further split into smaller ones, placing new separators on them. Thus, using separators, you can build a template of any complexity. And in the resulting areas, you can place any template items.

  • Map. Displays map in the selected zone. Please note that the maps will only be displayed if they have been previously created by the Administrator.

  • CMS Object Tree – Lets you place the object tree in any available zone. You can use the object tree to display various devices and view their state in a compact form.

  • File Manager – Lets you place the screenshot manager area in any available zone. You can use the screenshot manager area to view, copy, and delete screenshots either from local or network server.

  • AutoTRASSIR/AutoPass Log. Displays the list of all recognized license plate numbers from AutoTRASSIR/AutoPass plugin in random area.

  • AutoTRASSIR/AutoPass Event. Displays detailed information about the recognized license plate number from AutoTRASSIR/AutoPass plugin in random area.

  • Active monitor – An area for current object video display. To add an active monitor to a template, drag-and-drop the menu item onto the desired zone.

    This area can display video either for cameras (direct signal sources) or for other objects (for example, Orion ACS devices). If a video from a specific camera is bound to an Orion ACS device, it will be displayed in the active monitor area, as well.

  • Minibrowser. This is an essential tool for displaying any text or graphic info received from the server analytical modules. The information is displayed using automation rules and scripts. To learn more about using scripts, see the "Administrator's Guide" (Scripts).

    For example, a script that calculates the average speed of traffic along a section of road displays a list of cars that have violated the speed limit and those that passed without any violation.

  • Phone. Allows displaying SIP-telephone panel in random area.

  • Face Recognizer log. Display a list of people detected by the Face Recognizer plugin on a random area.

  • Face Recognizer event. Display a detailed info on a person detected by the Face Recognizer plugin to a random area.

  • Access Control Event. Display a detailed info about the person identified by TRASSIR ACS to the random area.

  • Access Control log. Display a list of people identified by TRASSIR ACS to the random area.


Important

Note that the elements described above can only be placed in empty areas or areas with layouts. If you make a mistake when creating a template and want to swap one element for another, use

Don't forget to save the new template with