In order to activate the plugin, go to the Channel settings to the Software detectors area and select Face recognizer 2.0, then select the Server, which will calculate the analytics.
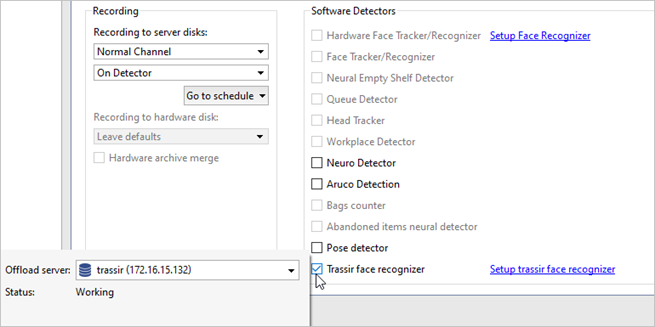
Press the Face recognizer 2.0 settings. The detector settings will open.
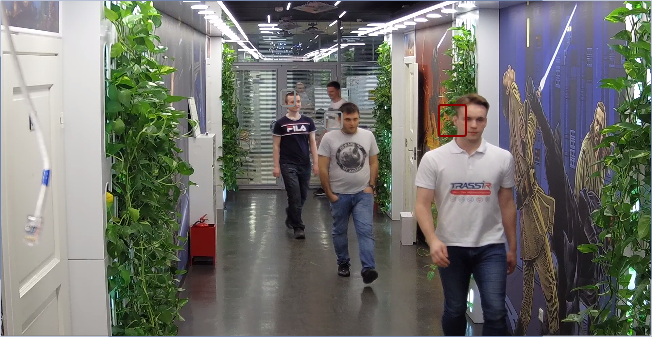
You can check the correctness of the detection settings, by enabling the figure display. To do this, right-click on the image and select the View options... item in the drop-down menu. Set the Show figures flag and select Face recognizer item in the drop-down menu. The recognized faces will be highlighted on the image:

You can check the full plugin operation in the operator interface. Create a simple template to do this.
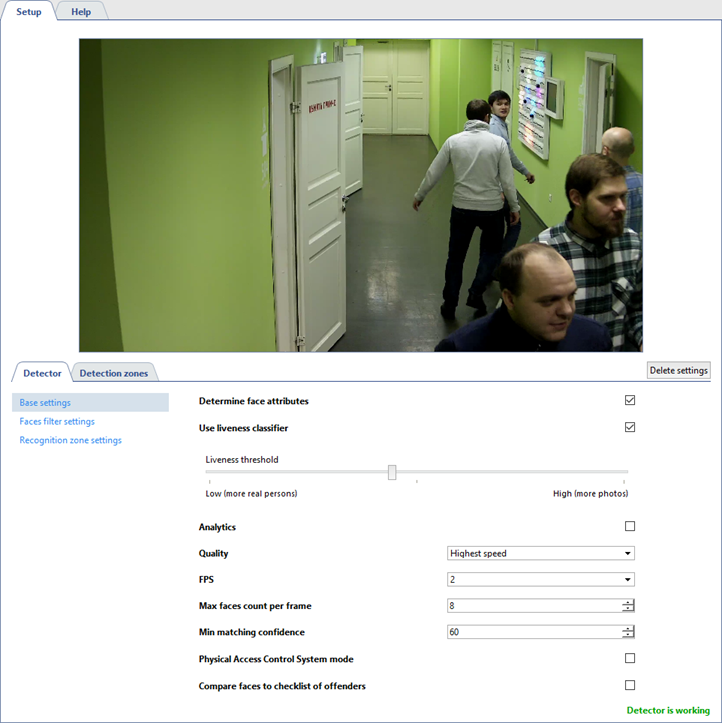
You can configure the operation of the detector on the Detector tab.
-
The basic settings of the detector let you configure the following parameters:
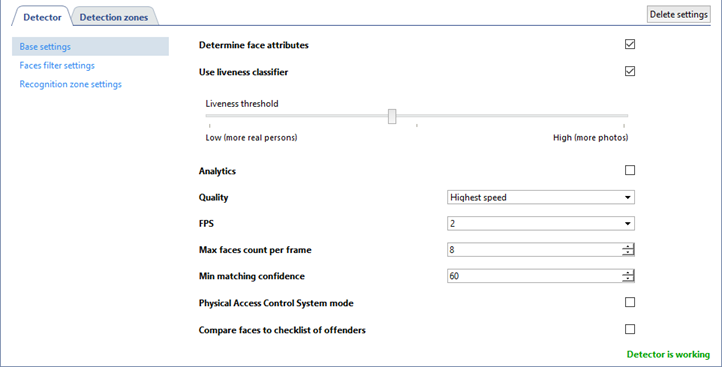
- Determine face attributes - set the flag to display gender and age when a person is recognized.
- Set the Use liveness classifier flag and specify the Liveness threshold to allow the detector to distinguish between a real person and a photo or image of a person. The higher the threshold is, the higher is the facial liveness value will be used, by which the detector will determine whether a person or a photo is in the frame.
- Analytics -set the flag to let the detector analyze the gender and age of the person in the frame.
- Quality - select the speed and quality of the detector operation. The higher the recognition quality is, the lower is the processing
speed, and vice versa.
Tip
To ensure the detector correct operation, you should select the same quality in the analytics server settings as in the detector settings.
- FPS - frame rate.
- Max faces count per frame - set the maximum number of faces that the detector can recognize in one frame. If the number of faces exceeds the selected value, the detection frames around them will be gray, and such faces will be displayed as unrecognized in the operator interface.
- Min matching confidence - set the degree of correspondence between the detected person and the person in face database.
- Set the Physical Access Control System mode flag and select the Viewing time to use the detector in Access Control.
-
The Faces filter settings menu lets you set up the recognized face parameters.
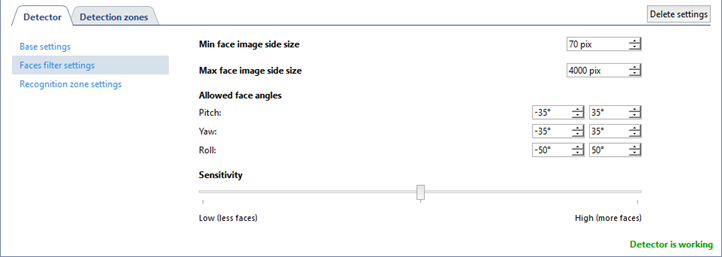
- Min face image side size and Max face image side size - set the range of face sizes with which the plugin works.
- Allowed face angles - the range of face tilt / rotation angles, in which the plugin can recognize a person: narrow axis - head tilt forward / backward, vertical axis - face turns right / left, roll axis - head tilt right / left.
- Sensitivity - the detector sensitivity level. The higher the value is, the higher is the probability of false alarms.
-
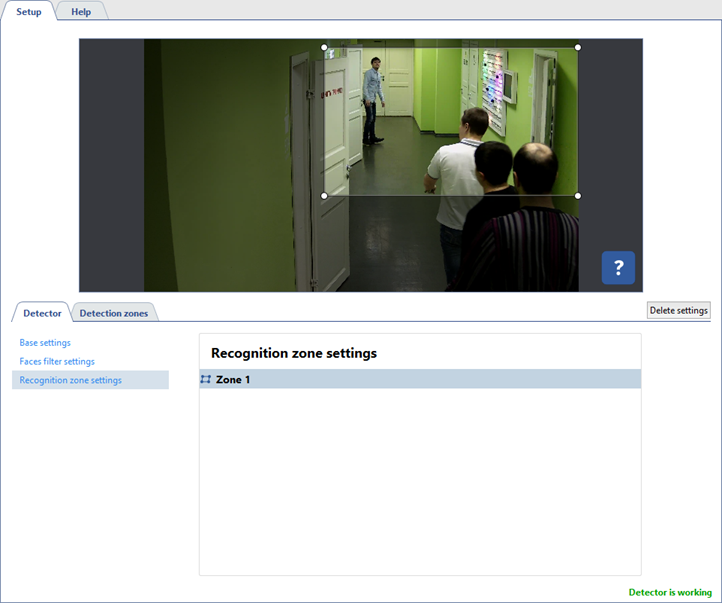
The Recognition zone settings menu lets you specify the area in which faces are recognized. The neural network does not transmit the entire image from the camera, but a selected part of it, which improves the recognition quality. Unlike detection zones, the recognition zone is always rectangular. You can resize it by dragging the vertices.
The Object counting tab lets you create zones in which faces will be detected. By default, there is a zone created in the settings that occupies the entire image area. You can adjust its size by changing the position of the corners, if necessary.
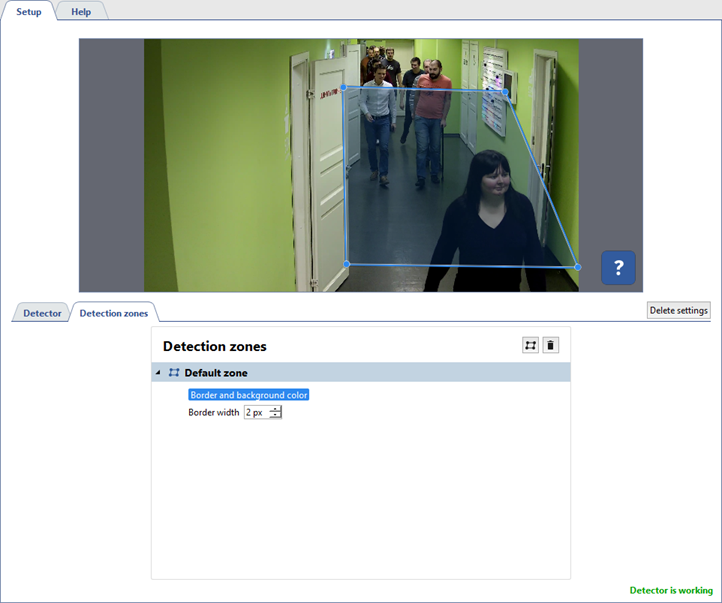
In order to create a new counting zone, press  and set its vertices on the image. Place the cursor to the zone starting point and left-click or press CTRL+ENTER to complete the zone drawing.
